How to set up Google Analytics (Part-1)
What makes the web such a powerful medium for marketing is the ability to track and measure virtually every statistic you need to build a stronger and more usable website. This is where Google Analytics comes in; the free software allows you to understand your traffic on multiple different levels and find out thier demographics and behavior of your visitors. Google Analytics is a virtual must for any website owners who are looking to increase their traffic and reach.
By being active on Google Analytics you can ensure that you keep up-to-date with your traffic. Remember that you need to know what’s working and what’s not, especially when it comes to page clicks and other important measurements. Your website should be viewed as something that is a living breathing thing, so it’s important to you not only understand the stats of your website but also do revision and updates.
In part 1 of this tutorial, we will outline how to set up Google Analytics.
*Note: In part 2 we will diving into some of the most important metrics you need to track.

Step 1: Signing Up
You first step to being a more informed website owner is to sign up for the free service. You can find the link here. If you do not have an account with Google, you must first create one. Start by filling out the required fields:
- Account Name
- Website Name
- Website URL
In the data sharing setting you can choose whether you want to share the data that you receive with Google. For the most part all data is confidential and is simply aimed at improving features of the community. Read each check box carefully and decide if you want to participate or not.
Once you have followed the instructions and filled out the fields, Google will then ask you to agree to its terms of service, click agree and your on your way!
Step 2:
Now that your in the Google Analytics dashboard you can begin by grabbing the tracking code. Simply Copy and paste the code into every page you want to be tracked if you have static website.
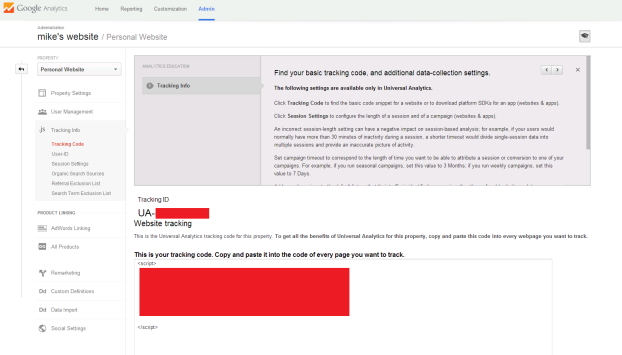
*Note: Tracking Code for Google Analytics on static website go before the closing tag of your </head>
If you using a content management system such as WordPress, you will need to log in to the backend of you website (www.example.com/wp-admin). Once your there you must you once again copy and paste the the code into your theme – Appearance > Editor > Paste Code.
Another similar way is to install the Google Analytics Plug in. There are paid and free versions for your use. What’s great about this is that it is much simpler than copying and pasting and is often just a good. The Plug in tab can be found on your main navigation. Search around for popular analytics plug in or buy the premium analytics by Google. Check it out here.
Step 3:
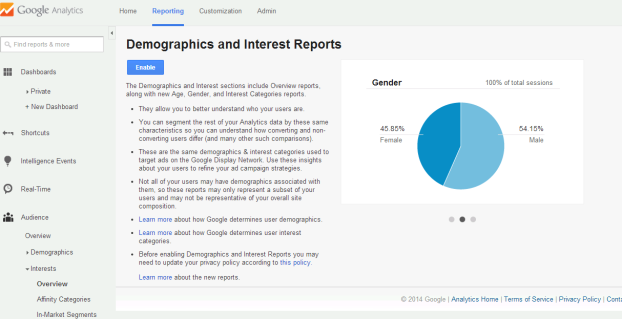
Log into your Google analytics dashboard to see the results! Give it a few hours to see traffic number and their behaviors. Happy tracking everyone!